Prerequisites:
- a printing/copying account from Publication Services (speak with Kat Versola)
- an Apple computer connected to the A.S. network
If you already completed the step to add the printer then proceed to the rest of the instructions. Otherwise, please see the FAQ titled, “How do I add the Konica printer to my computer?” first before you follow the rest of these instructions.
1. Open up Microsoft Word and create a new document.
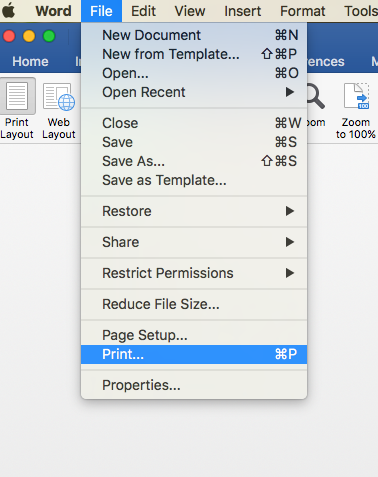
2. On the Microsoft Word menu select, “File” => “Print”

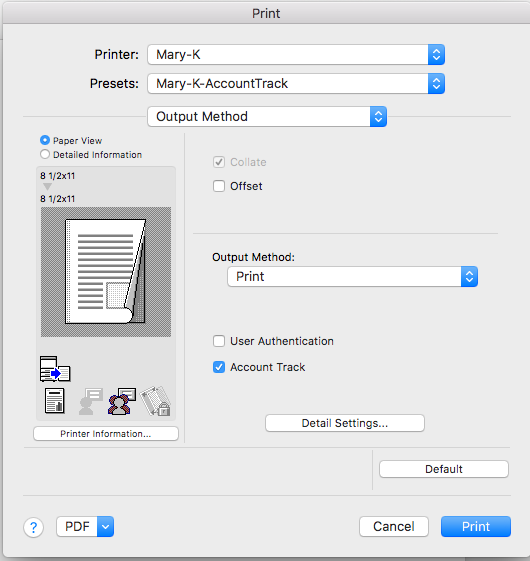
3. Select the correct Konica printer (Mary-K if applicable) and also select “Output Method”

4. Place a checkmark on the “Account Track” feature as in the picture above.
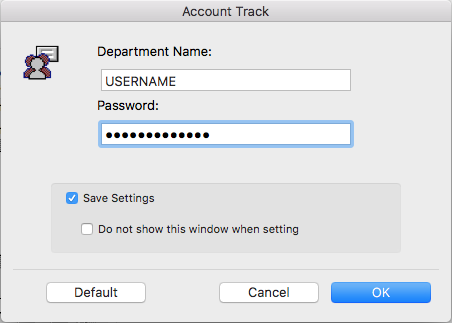
5. A new little window will pop up where you can enter your account name and password as given to you by Publications/Kat). Place a check-mark on the “Save Settings” option:
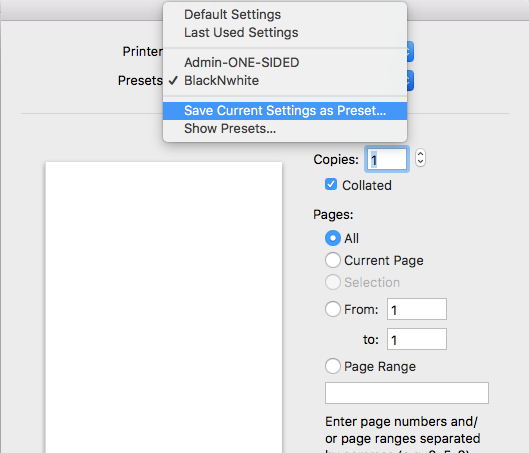
6. Before printing, save this setup as a Preset. On the image of step #3 above, we clicked on the “presets” dropdown menu and selected, “Save Current Settings as Preset…” You can call it “Mary-K-AccountTrack” or just “Account Track”.
7. When using the preset for the first time, click OPTION + the Print button. This will make this preset your default printing option next time.


